When I first started out in the anti-static plastics industry, I’d pull up a spec sheet, run a quick surface resistance test, and call it a day. That was five years ago, before I’d seen a customer’s $200k electronics batch go up in a tiny static spark because we’d skipped a critical step in evaluation. Now, as someone who’s spent every workday since then helping manufacturers pick the right static-dissipative plastic, I can tell you this: evaluating anti-static performance isn’t just about picking a number off a test chart. It’s about understanding what that number actually means, how it holds up in your specific environment, and which test method aligns with your end product’s needs. Anti Static Plastics
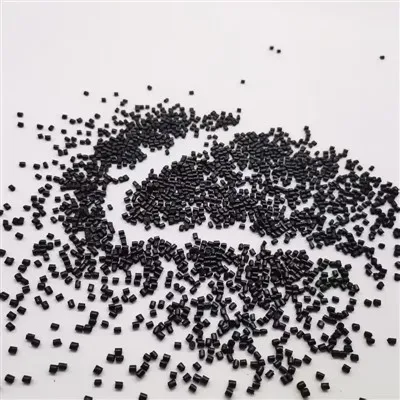
Let’s start with the basics, because so many of the newer clients I meet mix up the terms. Anti-static plastics aren’t one-size-f-all—we categorize them into two main groups, and each is evaluated differently. There’s conductive plastics, which have a surface resistance of 10^3 to 10^6 ohms per square, designed to bleed static charge immediately. Then there’s static-dissipative plastics, which clock in at 10^6 to 10^12 ohms per square, perfect for most electronics assembly, packaging, or medical components where you don’t want too much conductivity (which can damage sensitive circuits). The mistake I see most people make is grabbing a resistance value without asking: “What conditions will this plastic face, and what’s my acceptable risk of static discharge?”
The first and most foundational evaluation step is surface resistance testing, but you have to do it right. I’ve seen way too many labs run tests on a brand new, pristine plastic sample in a controlled 23°C and 50% RH (relative humidity) environment, then hand that number over to a customer whose part will be used in a desert warehouse where RH drops to 20%. Humidity is a silent killer here—static charge moves through moisture on a plastic’s surface, so lower humidity makes all plastics, even the highest-grade dissipative ones, more prone to holding static. When I test samples for a client, I don’t just run one test. I run three: at 10% RH, 50% RH, and 80% RH, because that’s the range their product will operate in. I also test both the surface of the plastic and its bulk resistance, because some additives only work on the surface—if you scratch that surface (which happens all the time when manufacturing a part), you’re left with a regular plastic that can hold charge. A good anti-static plastic will have bulk resistance that stays consistent even if the surface is damaged.
Next up is static decay testing, which is actually more relevant for end products than surface resistance. Surface resistance tells you how easily charge moves on a plastic, but static decay time tells you how long it takes for a charge to bleed off once it’s built up. For most electronics components, the industry standard is a decay time of less than 0.1 seconds for a 1000V charge. If it takes longer than that, the charge is still there when you move the part, and that’s when you get tiny sparks that fry microchips. I once had a client who made hard drive enclosures—they’d been using a plastic that passed surface resistance tests but had a decay time of 1.2 seconds. When their drives failed in transit, we tested the enclosure: the charge would build up during vacuum packaging, take over a second to dissipate, and when someone opened the box, the spark destroyed the read/write head. That’s a $10 part leading to a $1000 loss, all because we didn’t prioritize decay time over just surface value.
But here’s where it gets tricky: test conditions. Most labs use a plate electrode method for static decay, which is fine for flat sheets, but if your part is a complex 3D molded component—like a connector housing or a tray with sharp edges—that method doesn’t apply. I learned this the hard way with a client making ESD (electrostatic discharge) safe trays for semiconductor wafers. Their lab ran decay tests on a flat sheet of the plastic, which passed, but when we tested the actual tray (with deep pockets and sharp corners), the decay time jumped to 0.8 seconds. The edges of the tray had lower additive concentration, so charge would get trapped there, and the plate electrode couldn’t replicate the shape’s electrical field. Now, for every custom part, we do a field potential decay test, which uses a smaller probe that mimics how a human finger or a circuit component would interact with the part. That’s the difference between a test that looks good on paper and one that works in real life.
Then there’s durability testing, which is probably the most overlooked part of evaluation. A plastic might pass all lab tests when it’s brand new, but what happens after 100 cycles of being autoclaved (for medical parts), or after being tumbled in manufacturing bins for a thousand times, or after being left in UV sunlight for a year? Anti-static additives in plastics can leach out, wear off, or break down over time. I’ve seen some cheap anti-static plastics lose their static-dissipative properties after just 50 uses in a warehouse bin. The additives migrate to the surface to do their job, but if they’re not bonded to the polymer chain, they rub off or wash away. When we test durability, we do what we call “accelerated aging” tests: we expose samples to high temperatures, humidity, abrasion, and even chemical cleaners, then retest surface resistance and decay time. If after 1000 hours of accelerated aging, the resistance moves more than one order of magnitude (like jumping from 10^9 to 10^10 ohms), that’s a red flag. For a client making packaging for food, we also test if the additives will leach into the packaging when cleaning it, which is a regulatory no-no in many places.
Another test that’s specific to certain industries is charge generation testing. If your plastic is going to be moved by automation, or rubbed against other materials during assembly, you need to know how much static it generates when it’s in motion. We use a test called the Triboelectric Series, which measures how much charge builds up when two materials rub together. For example, if you have an anti-static plastic tray that rubs against a cardboard box during shipping, you don’t want the plastic to generate more than 500V of static. Any higher, and even a small component can be damaged. I once worked with a client who made RFID tags—their tag housings were generating 1200V when rubbed against packaging, which wiped the RFID chip. We swapped their plastic for one that had a triboelectric charge of 300V, and that fixed the problem entirely. It’s a simple test, but it’s make-or-break for products that move or rub against other materials.
Now, let’s talk about what all this means for you, the buyer. Too many suppliers will hand you a spec sheet with a single resistance number and call it “anti-static,” but that’s not enough. Ask to see test reports that show resistance across different RH levels, decay time at your operating conditions, durability after aging, and triboelectric charge generation. Also, don’t forget to consider your end product’s requirements. If you’re making a static-safe mat for a workstation, conductive plastic (10^3 to 10^6 ohms) is probably fine, because you need to bleed charge super fast. If you’re making a medical implant tray, static-dissipative plastic (10^6 to 10^12 ohms) is better, because you don’t want the plastic to conduct charge to the sensitive implant during handling. If you’re packaging large, rugged parts, you can go a bit higher in resistance, because the risk of static damage is lower than for microchips.
I always tell new clients to ask for small sample runs first. Don’t commit to a full order of plastic until you’ve molded a few parts, tested them in your actual environment, and run your own in-house static tests. I had a client who ordered 10,000 pounds of plastic based on lab test results, and when they molded the parts, the static decay time was double what the lab had reported—because their molding process used a higher temperature that burned off half the anti-static additives. Small sample runs let you adjust your molding parameters, or switch to a different plastic grade, before you waste money on a full order.

At the end of the day, evaluating anti-static performance is about connecting lab data to real-world use. It’s not a matter of finding the “best” plastic—it’s finding the one that passes the tests that matter for your product, your operating conditions, and your budget. If you’re not sure where to start, or if you’ve had issues with static damage in the past, I’m here to help. We can provide free sample testing, walk you through what each test result means, and help you pick the right anti-static plastic for your specific application. Get in touch with our team to discuss your project, and let’s make sure your parts stay safe from static—no more wasted batches, no more unexpected failures.
Antistatic Additives References
- “ESD Association Standard for Electrostatic Discharge Control – Part 1: General Requirements,” ANSI/ESD S20.20-2020
- “Plastics – Determination of Surface Resistance and Volume Resistance,” ISO 1853:2018
- “Test Method for Electrostatic Decay Time of Materials Used in Electrostatic Sensitive Devices,” MIL-STD-3010, Method 4046
- “Accelerated Aging of Plastics: Principles and Practices,” ASTM D4329-21
- “Triboelectric Charging of Polymer Materials for Electronic Packaging Applications,” Journal of Electrostatics, Volume 95, 2018, Pages 1-8
Jiangxi Sugo Advanced Materials Co., Ltd.
With abundant experience, we are one of the most professional anti static plastics manufacturers in China. Please feel free to buy high quality anti static plastics in stock here and get free sample from our factory. We also accept customized orders.
Address: 1st Fugong Rd, Futian Industrial Park, Dingnan, Ganzhou City, Jiangxi Prov., R.P.C 341900
E-mail: EILEEN@SUGOPLAS.COM
WebSite: https://www.sugo-esd.com/
